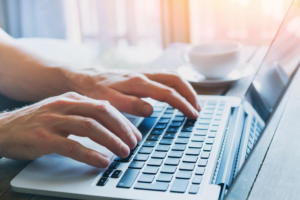
When it comes to making your laptop screen just right, one important thing to know is how to modify your laptop backlight. In this article we’ll be showing you how to modify your laptop backlight.
Steps To Modify Your Laptop Backlight
In this subheading, we’ll take a closer look at adjusting backlight settings using function keys. We’ll cover different laptop brands and break down the steps for you in simple terms.
Understanding Function Keys
First things first, let’s talk about function keys. You can find them at the top of your laptop’s keyboard. These keys have default functions, but they can do even more when you use them with the Function (Fn) key – usually close to your spacebar.
Look out for the brightness symbol, which marks these keys and indicates their ability to adjust your screen’s brightness.
Different Keys for Different Laptops
Different laptop brands may have different key combinations for adjusting backlight. For example, on a Dell XPS laptop, you need to hold down the Fn key and press F11 or F12 to change the screen brightness.
It’s crucial to know the specific keys on your laptop and where they are for adjusting your backlight easily.
HP Chromebook: No Need for Fn
Some laptops, like the HP Chromebook, keep things simple. They have keys dedicated only to brightness control. You can find these keys at the top of the keyboard, and you don’t need to bother with the Fn key. It’s a user-friendly approach that makes adjusting brightness a breeze.
Recognizing Key Symbols
The symbols on function keys might look different from one laptop to another, but they often include an icon that looks like a sun. This symbol indicates that you can adjust your screen’s brightness.
Understanding these symbols is essential, especially if your laptop has dedicated keys for modifying backlight. Check the laptop’s manual or documentation for the right symbols.
Compatibility
Remember that key combinations may vary depending on your laptop model. Some laptops might need you to press the Fn key along with the designated brightness key.
Get familiar with your specific keyboard layout to modify your laptop backlight without any hiccups.
Windows Laptops: Easy Brightness Access
Windows laptops usually have function keys for backlight adjustment, marked with a sun logo or a brightness icon.
These keys are usually above the numeric row on your keyboard, making it easy to find and adjust brightness levels. Keep in mind that the key combination might be different, so it’s a good idea to check your laptop’s manual for precise instructions.
Mac Laptops: Simple Brightness Control
MacBooks keep things straightforward when it comes to adjusting backlight. Dedicated keys on the top row of the keyboard, like F1 and F2 (on MacBook laptops) or F14 and F15 (on Mac desktops), let you control screen brightness seamlessly.
Depending on your MacBook model, you might have to press the Fn key along with the brightness key.
Tips for Easy Use:
To make the most of function keys for adjusting backlight, try these simple tips:
- Play Around with Key Combinations: Experiment with different key combinations to find the easiest way to adjust your backlight.
- Check Your Laptop Manual: Take a look at your laptop’s user manual or online guides to understand the functions of specific keys and symbols.
- Personalize Your Settings: Explore your laptop’s settings to customize backlight adjustments based on what works best for you.
Modifying backlight with function keys is a quick and accessible way to enhance your laptop’s display.
Whether you’re using a Windows laptop, an HP Chromebook, or a MacBook, understanding how function keys work and their combinations is the key to a smooth experience.
Modify your laptop backlight effortlessly by using these techniques in your daily routine, creating a comfortable viewing environment that suits your preferences.
More Ways To Modify Your Laptop Brightness Settings
Another way to do this is to modify your laptop backlight, and we’ll explain how to do it through system settings in this detailed subheading.
This method is especially useful for both Windows laptops and Macs, providing an alternative to using function key.
Windows Laptops: Using the Action Center
If you’re using a Windows laptop, the Action Center is your go-to place for adjusting your laptop backlight manually. You can find the Action Center by clicking on the little notification bubble icon in the lower right corner of your taskbar.
Once there, you can easily move the brightness slider to make your laptop screen brighter or dimmer.
If you don’t see the brightness slider, don’t worry. Click on the Expand option, and it will reveal more controls, including the brightness slider.
This makes it simple to tweak your laptop backlight to match different lighting situations or your personal preferences.
Windows Mobility Center: Another Option for Adjusting Brightness
Windows Mobility Center is another way for Windows users to manually adjust their laptop backlight. You can open it by pressing Win + X. Inside, you’ll find various settings, including display brightness.
By moving the Display Brightness slider, you can easily modify your laptop backlight, offering a centralized control panel for those who prefer it.
Settings Menu: Dive into Customization
For a more detailed and personalized approach, the Settings menu in Windows is the place to be. Press Win + I, navigate to System, and then click on Display. Under Brightness and color, you’ll find the brightness slider.
This method gives you more control over modifying your laptop backlight, allowing you to make adjustments that suit your specific needs.
Keyboard Shortcuts: Quick and Easy Adjustments
While function keys are often associated with modifying brightness, they also play a role in manual control through system settings.
Most Windows laptops have dedicated function keys for brightness, often represented by a sun logo. Finding these keys, usually located above the number row, allows you to quickly and efficiently modify your laptop backlight.
Mac Laptops: The Apple Settings
For Mac users, modifying the laptop backlight is a straightforward process through system settings. Click on the Apple menu, go to System Preferences, and then click on Displays.
There, you’ll find the Brightness slider, which lets you easily modify your laptop backlight. This user-friendly method provides a simple and visual way to adjust display brightness.
Built-in Display Feature
Mac users also have the option to use the built-in display feature for adjusting brightness. By clicking on the menu, selecting System Preferences, and then clicking on Displays, you can navigate to the Brightness slider.
This method gives you another way to modify your laptop backlight, providing flexibility in choosing how you want to make adjustments.
Control Strip of the Touch Bar
For MacBook users with a Touch Bar, adjusting brightness becomes an interactive experience. By tapping on the brightness button within the Control Strip, you can swipe left or right to smoothly adjust your laptop backlight.
This touch-centric method offers a unique way to modify your laptop backlight, catering to those who appreciate a tactile approach.
Manually adjusting your laptop backlight through system settings gives you a variety of options. Whether you’re using the Action Center on a Windows laptop or exploring the Brightness slider on a Mac, these methods helps you to modify your laptop backlight according to your preferences.
Experiment with different options, find the method that works best for you, and discover the ideal brightness level that enhances your overall experience.
As technology advances, the ways to customize your laptop’s display settings continue to develop, ensuring that users have the tools they need to create a visually optimized workspace tailored to their individual needs.
Remember, modifying your laptop backlight is about making your screen comfortable for your eyes and your environment. So, take advantage of these straightforward methods to find the perfect brightness balance for your laptop.
How to Enhance Your Laptop Brightness Automatically
Automatic brightness adjustment settings are a useful feature that can improve your laptop display without you having to do much.
In this easy-to-follow guide, we’ll look at how these settings work, both on Windows laptops and Macs, and how you can use them to modify your laptop backlight effortlessly.
Windows Laptops: Using the Action Center for Automatic Adjustments
If you’re using a Windows laptop, there’s a neat feature called automatic brightness adjustment in the Action Center. This feature allows your laptop to change its brightness based on the light around it. Here’s how you can turn it on:
- Go to Settings: Press Win + I to open the Settings menu.
- Choose System and then Display: In the Settings menu, click on “System” and then choose “Display.”
- Activate Automatic Brightness: Look for the checkbox that says ‘Change brightness automatically when lighting changes.’ Tick this box to enable automatic brightness adjustment.
Once you’ve done this, your Windows laptop will keep an eye on the light in your surroundings and modify your laptop backlight accordingly. This is a hands-free way to make sure your screen looks good no matter where you are.
Macs: Easy Brightness Adjustments Based on Light
Mac laptops also have a simple way to let your laptop adjust its brightness automatically. Here’s how you can turn it on:
- Open System Preferences: Click on the Apple menu, then select “System Preferences,” and choose “Displays.”
- Activate Automatic Brightness: In the Displays menu, find the option that says ‘Automatically adjust brightness.’ Tick this box, and your Mac laptop will start modifying your laptop backlight based on the light conditions.
Mac laptops use sensors to figure out how much light is around you, and they adjust the brightness accordingly. It’s a hassle-free way to make sure your screen is just right without you having to do anything.
Windows vs. Mac: How They Handle Automatic Adjustments
While both Windows and Mac systems have automatic brightness adjustment settings, they work a bit differently.
Windows laptops often use sensors built into the hardware to detect light changes, while Mac laptops use a combination of hardware sensors and a smart software algorithm for a more precise adjustment.
Fine-Tuning for Your Comfort
Automatic brightness adjustment settings usually come with some extra options to let you fine-tune things. While it’s nice to have the screen adjust on its own, some people like to have a specific level of brightness. Both Windows and Mac systems let you do this:
- On Windows Laptops:
You can set a preferred default brightness level in the Settings menu. By moving the slider under ‘Change brightness,’ you can choose a default brightness even when the automatic adjustment is on. - On Mac Laptops: Mac users can set their preferred brightness level by going to System Preferences, Displays, and adjusting the Brightness slider. This way, the automatic adjustment will always align with what you like.
Combining Manual and Automatic Adjustments
While automatic brightness adjustments are handy, there are times when you might want to control things yourself.
Balancing between manual and automatic adjustments ensures that your screen looks just the way you want it:
- Adapting to Changes: Automatic adjustments are great for when you move from a bright room to a dim one.
- Sticking to Preferences: Manual adjustments are perfect for those who like to keep a steady level of brightness that suits them.
By finding the right mix of these approaches, you get the benefits of both – the adaptability of automatic adjustments and the personalization of manual control.
Considering Battery Efficiency
Automatic brightness adjustments aren’t just about making things easy; they can also help your laptop’s battery last longer.
By changing the brightness based on how much light is around, both Windows and Mac laptops use power more efficiently. This is especially important for people who use their laptops on the go.
Dealing with Challenges
While automatic adjustments are helpful, sometimes they might not work exactly as you’d like. For instance, sudden changes in light might cause the screen to adjust quickly, which can be distracting. Here’s how you can deal with such challenges:
- Adjusting Sensitivity: Check your laptop’s settings to tweak how sensitive the sensors are. This can help you find a balance that feels just right.
- Keeping Everything Updated: Make sure your laptop’s software and system are up to date. Manufacturers often release updates that make the automatic adjustments work better.
Automatic brightness adjustment settings are a straightforward way to modify your laptop backlight without much effort. Whether you use a Windows laptop or a Mac, these features ensure that your screen adjusts to where you are.
By understanding the differences between systems, making small adjustments to your liking, and thinking about battery efficiency, you can create a simple and comfortable way to make sure your laptop screen looks just right. Try out these settings, find what works for you, and enjoy a screen that suits your unique needs in any light.
Conclusion
In summary, it’s clear that modifying your laptop’s display is an important aspect of a comfortable computing experience. Whether you prefer using function keys, navigating system settings, or relying on automatic brightness adjustments, each method offers a unique solution.
Function keys provide a quick and accessible way to modify your laptop backlight, catering to different brands and preferences.
Manual adjustments through system settings, explored in-depth for both Windows and Mac laptops, offer a personalized approach. These settings allow users to fine-tune their display to match their unique preferences, combining the convenience of technology with individual comfort.
Automatic brightness adjustment settings, discussed for both Windows and Mac systems, introduce a hands-free approach to enhance your laptop display. This feature intelligently adapts to changing light conditions, ensuring optimal brightness without constant manual intervention.
The key is to find the right balance between these methods, incorporating them into your daily laptop use based on your preferences and the environment.
Whether you’re a fan of quick function key adjustments, hands-on manual control, or the automatic adaptability of your laptop, these guides empower you to make your screen comfortable and visually pleasing.
See Also: Privacy Configurations For Your iPhone: 4 Steps To Protect Access To Your iPhone
We Hope you’ve learned a lot from this article!! We’re glad you did. Join our telegram community to learn free tech skills, get up-to-date tech news, educational tech materials, free fintech online classes, that will help you grow and become profitable